
Interface Overview
STPro Animator provides a structured and user-friendly animation workspace designed for creating professional 2D animated content directly inside the browser.
The interface is divided into multiple sections that help users manage:
- Top Toolbar
- Left Panel
- Right Panel
- Canvas
- Timeline
Each section of the interface has a specific role in the animation production process.
Interface Layout Overview
Section titled “Interface Layout Overview”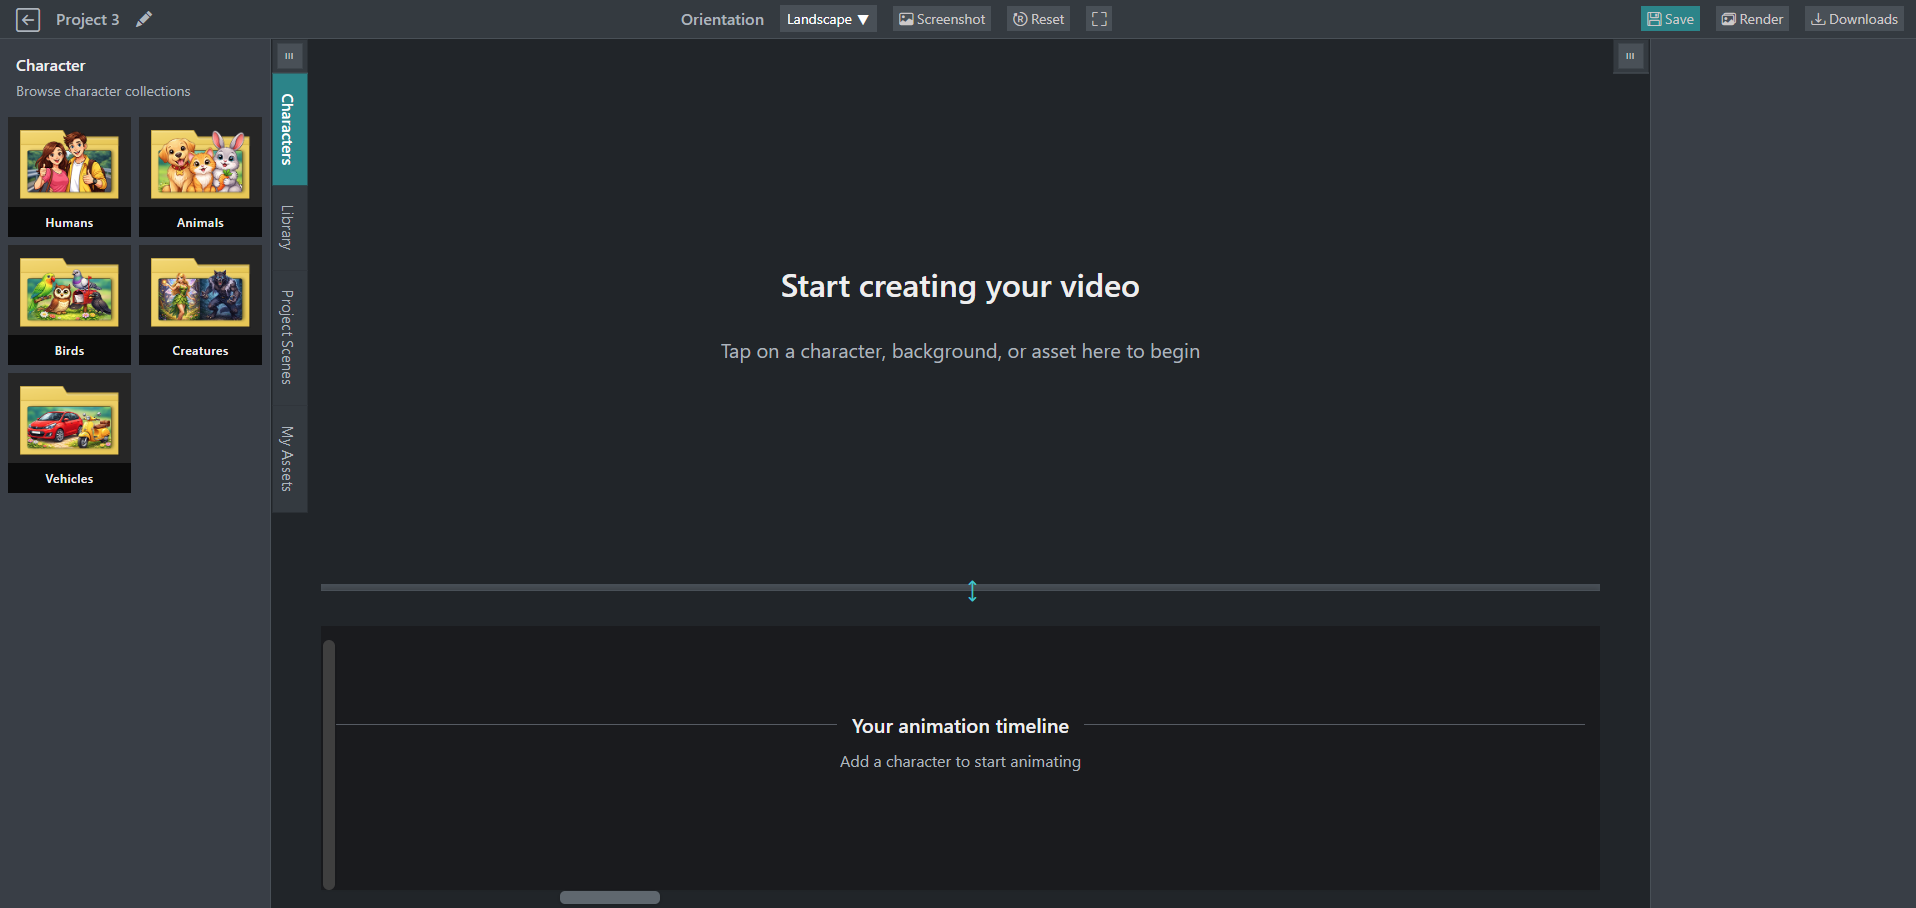
Top Toolbar
Section titled “Top Toolbar”The top toolbar contains important project and workspace controls.
Depending on the platform version, this section may include:
- Project controls
- Save options
- Render button
- Preview controls
- Orientation settings
- Screenshot tools
- Subscription Plan

Purpose of the Toolbar
Section titled “Purpose of the Toolbar”The toolbar helps users quickly access major project functions without navigating away from the workspace.
Typical actions include:
- Saving projects
- Rendering videos
- Switching workspace modes
- Previewing animations
Left Panel
Section titled “Left Panel”The left panel acts as the primary content and asset management section.
Users can browse and access:
- Characters
- library
- project scene
- My assets
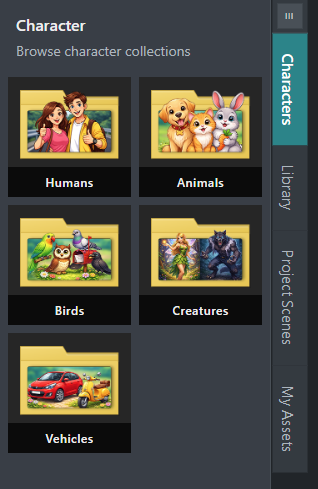
Character Section
Section titled “Character Section”The character library contains multiple categories of animated characters.
Common categories include:
- Humans
- Animals
- Birds
- Creatures
- Vehicles
Users can drag or add characters directly into scenes.
Asset Library
Section titled “Asset Library”The asset library contains reusable scene elements.
Available assets may include:
- Backgrounds
- Objects
- Loopers
- Visual effects
- Overlays
These assets help users quickly build animation environments.
My Assets
Section titled “My Assets”The My Assets section stores user-uploaded content.
Users may upload:
- Images
- Props
- Audio files
- Videos
- Backgrounds
- Human assets
Uploaded content becomes accessible for future projects.
Project Scenes
Section titled “Project Scenes”The left panel may also contain project scene controls.
Users can:
- Create scenes
- Organize scene order
- Switch between scenes
- Manage project structure
Workspace Area
Section titled “Workspace Area”The workspace area is the central animation canvas.
This is where users visually create and edit animations.
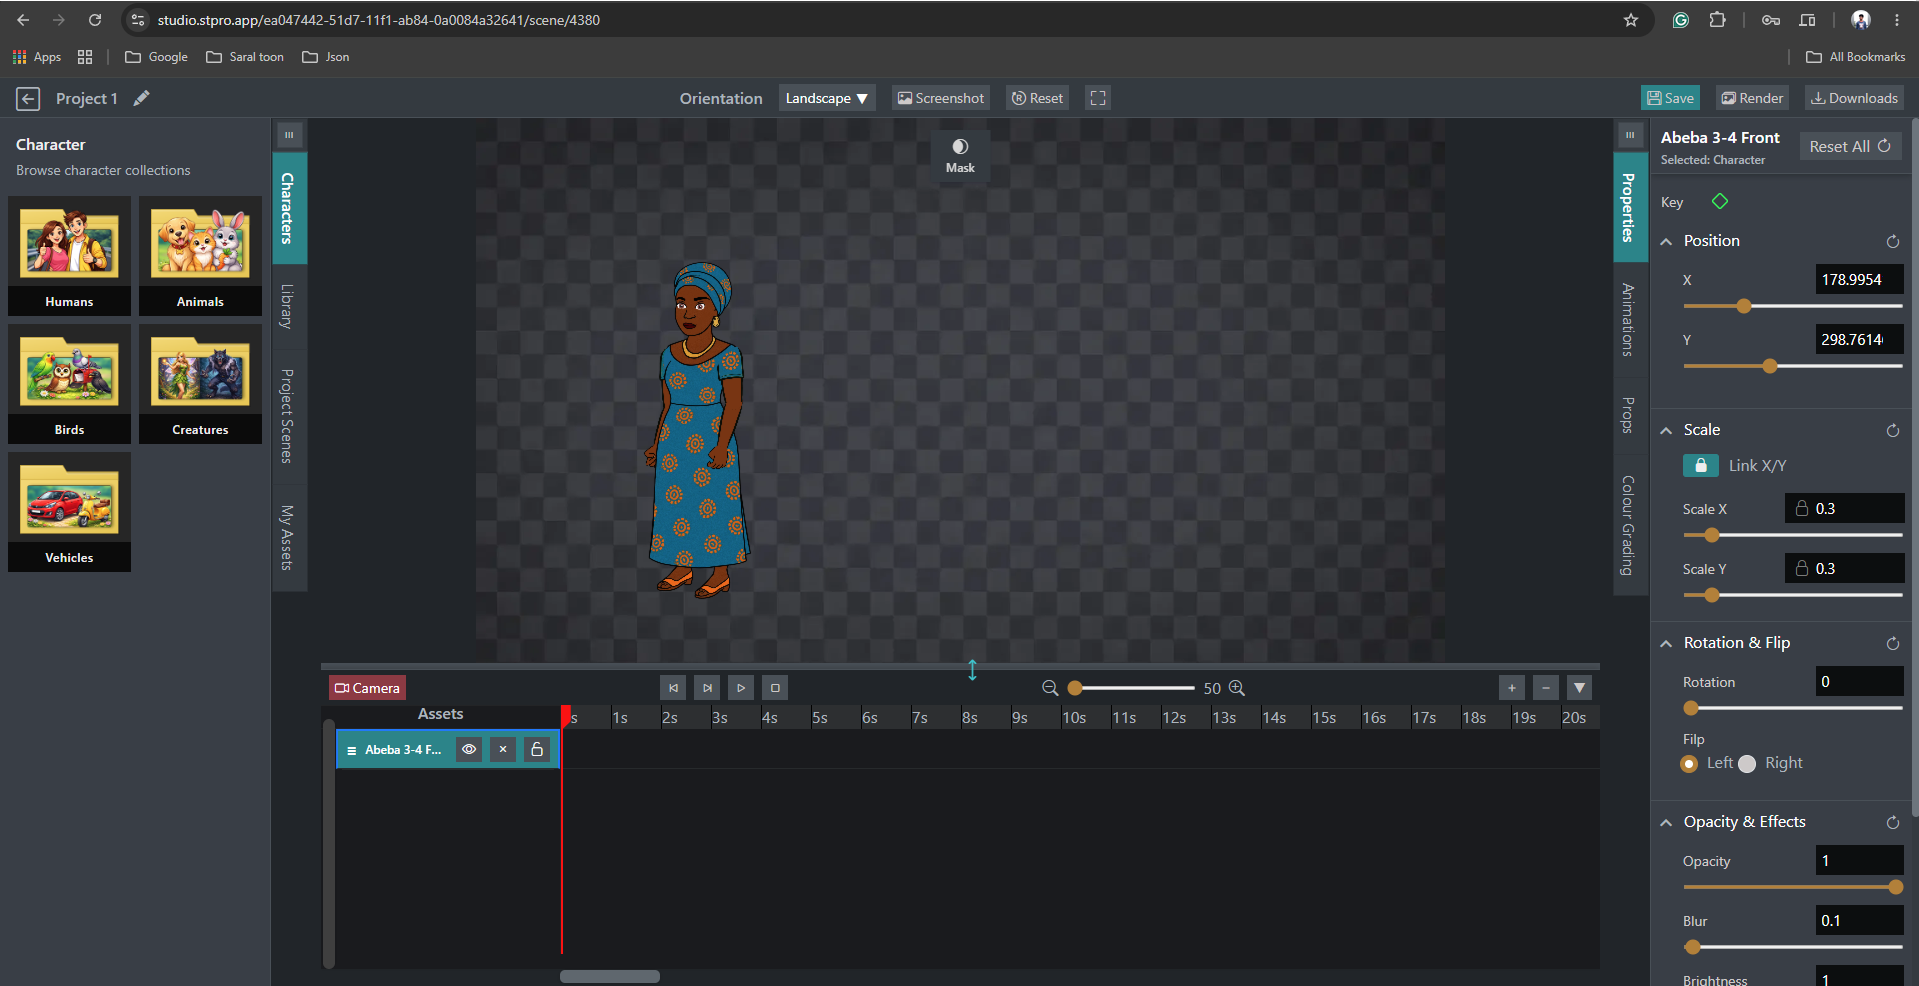
Main Functions of the Workspace
Section titled “Main Functions of the Workspace”Inside the workspace, users can:
- Add characters
- Arrange objects
- Position backgrounds
- Preview animations
- Design scenes
- Adjust composition
Scene Composition
Section titled “Scene Composition”The workspace helps users visually organize animation elements.
Users can control:
- Placement
- Scaling
- Layer arrangement
- Scene appearance
Timeline Section
Section titled “Timeline Section”The timeline is located below the workspace area.
It is one of the most important animation tools inside STPro Animator.
Purpose of the Timeline
Section titled “Purpose of the Timeline”The timeline helps users:
- Control animation timing
- Arrange animation layers
- Synchronize movements
- Preview sequence flow
- Manage scene duration
Timeline Features
Section titled “Timeline Features”Depending on platform functionality, users can:
- Add layers
- Extend animation duration
- Control playback
- Adjust timing
- Organize animation sequences
Playback Controls
Section titled “Playback Controls”Timeline playback controls may include:
- Play
- Pause
- Stop
- Timeline scrubber
- Frame navigation
These controls help preview animation progress.
Right Properties Panel
Section titled “Right Properties Panel”The properties panel appears on the right side of the interface.
This section displays editable settings for selected elements.
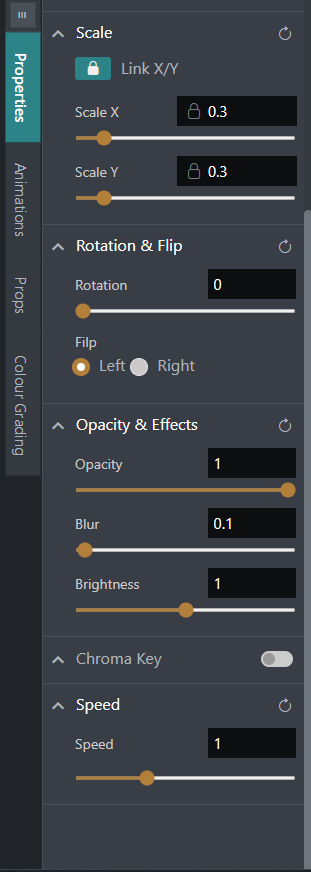
Dynamic Properties System
Section titled “Dynamic Properties System”The properties panel changes dynamically based on the selected item.
For example:
- Character properties appear when a character is selected
- Background controls appear when a background is selected
- Animation settings appear for animated elements
Animation Controls
Section titled “Animation Controls”Animation presets may include:
- Walking
- Talking
- Idle
- Hand movements
- Facial expressions
- Custom animations
Colour Grading
Section titled “Colour Grading”Colour grading tools help modify the visual appearance of selected assets or scenes.
Workflow Example
Section titled “Workflow Example”A typical workflow inside the interface may include:
- Select character from left panel
- Add character to workspace
- Adjust position and scale
- Apply animation from properties panel
- Control timing using timeline
- Preview animation
- Render final output
User Experience Design
Section titled “User Experience Design”The STPro Animator interface is designed to balance:
- Simplicity
- Accessibility
- Professional workflow support
This makes the platform suitable for:
- Beginners
- Educators
- Social media creators
- Professional animators
Missing Panels
Section titled “Missing Panels”Possible causes:
- Incomplete page loading
- Browser rendering issues
Solutions:
- Refresh page
- Restart browser
- Clear browser cache
Summary
Section titled “Summary”The STPro Animator interface combines asset management, scene editing, timeline animation, and rendering workflows into a unified browser-based production environment.
Its structured layout helps users efficiently create, manage, and render animated content using a streamlined and professional animation workflow.
Next Step
Section titled “Next Step”Continue to the next documentation section to learn about:
- Top Toolbar controls
- Project management actions
- Scene management options
- Save and render operations
- Workspace-level controls