
Timeline
The Timeline is the central animation control area in STPro Animator.
It allows users to control when animations start, how long they play, and how objects behave over time.
Every animated action inside a scene is managed through the Timeline.
Purpose of the Timeline
Section titled “Purpose of the Timeline”The Timeline helps users:
- Control animation timing
- Organize scene events
- Manage keyframes
- Synchronize character actions
- Coordinate audio and visual elements
- Preview animation flow
It serves as the foundation of the animation workflow.
Accessing the Timeline
Section titled “Accessing the Timeline”The Timeline is located at the bottom of the Animator workspace.
It remains available while editing scenes and updates automatically based on selected assets.
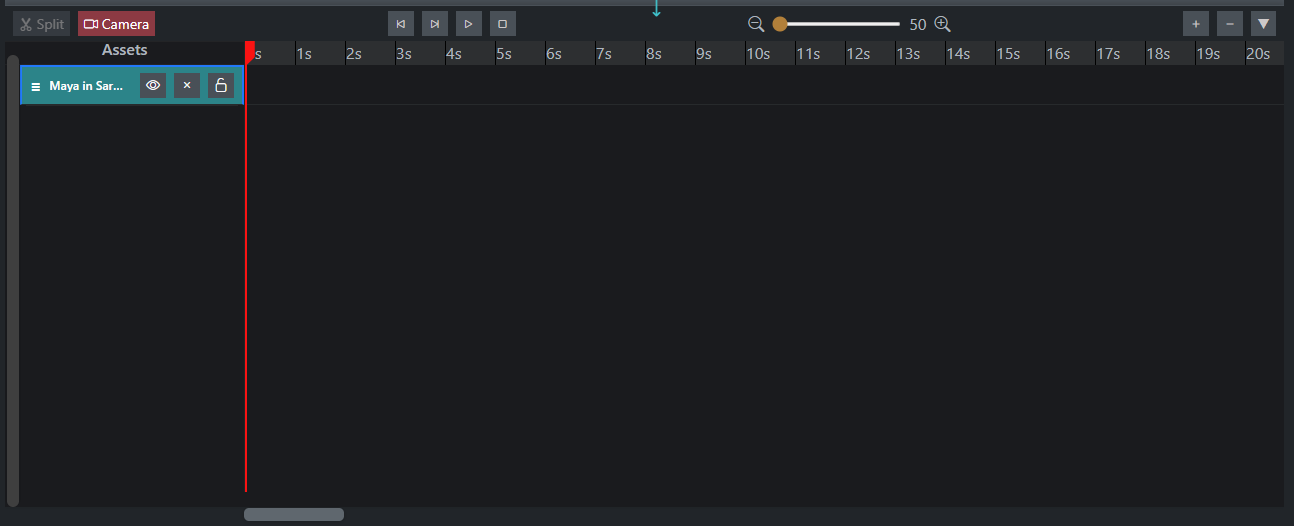
Timeline Components
Section titled “Timeline Components”The Timeline contains several important elements:
- Playback Controls
- Timeline Playhead
- Time Scale
- Animation Tracks
- Keyframes
- Zoom Controls
Each component helps users manage animation timing more precisely.
Playback Controls
Section titled “Playback Controls”Playback controls allow users to preview animations directly inside the editor.
Available controls include:
- Play
- Pause
- Stop
These controls help users review animation behavior before rendering.
Timeline Playhead
Section titled “Timeline Playhead”The Playhead indicates the current position within the animation.
Users can:
- Drag the playhead to a specific point
- Preview exact moments
- Create keyframes at precise locations
- Inspect animation timing
All animation edits are applied at the current playhead position.
Time Scale
Section titled “Time Scale”The Time Scale displays the duration of the scene.
It helps users:
- Understand animation timing
- Position keyframes accurately
- Synchronize multiple animations
- Manage scene pacing
Longer scenes contain a larger timeline range.
Animation Tracks
Section titled “Animation Tracks”Every animated object creates its own track inside the Timeline.
Tracks may include:
- Characters
- Images
- Videos
- Props
- Text Elements
Tracks help organize animations separately while keeping everything synchronized.
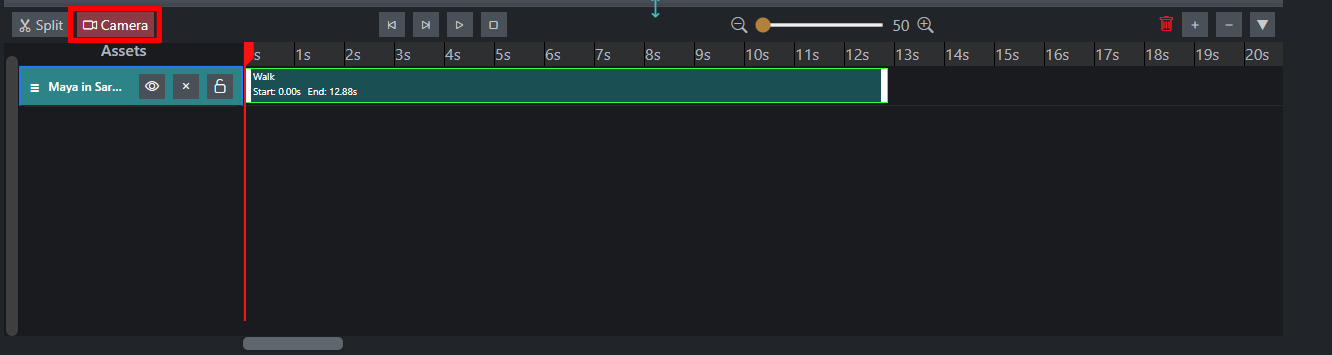
Camera Track
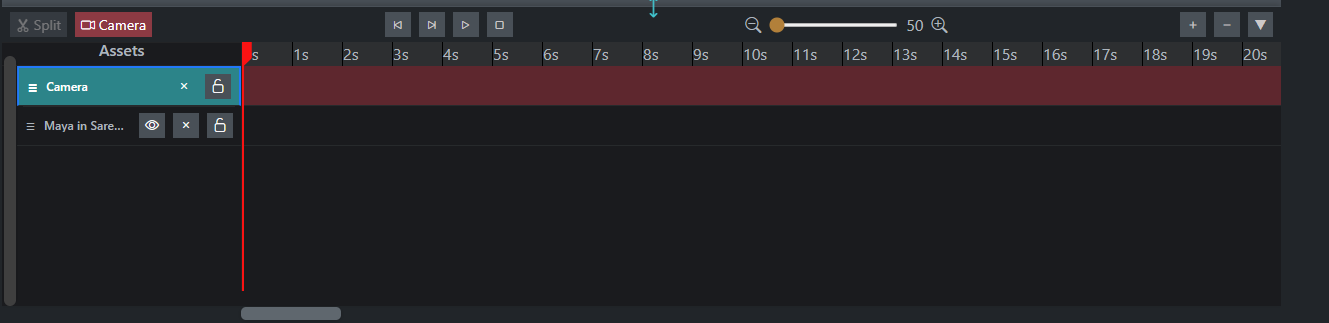
Section titled “Camera Track”The Timeline includes a dedicated Camera Track that controls the scene camera throughout the animation.
Unlike other assets, camera settings are applied globally across the entire scene timeline.
Camera Behavior
Section titled “Camera Behavior”The camera track controls:
- Camera position
- Camera movement
- Zoom adjustments
- Scene framing
- Camera transitions
Changes made to the camera affect the overall scene view rather than individual assets.
Global Timeline Application
Section titled “Global Timeline Application”The Camera Track applies to the entire timeline.
This means:
- Camera animations affect all visible scene elements.
- Camera movement is reflected throughout the rendered video.
- All characters, props, backgrounds, and effects are viewed through the active camera settings.
- Camera changes are synchronized with scene playback.
Unlike character or asset tracks, the camera is not attached to a single object and instead controls how the entire scene is displayed.
Camera Keyframes
Section titled “Camera Keyframes”Camera properties can be animated using keyframes.
Common camera animations include:
- Pan movements
- Zoom in
- Zoom out
- Scene focus changes
- Cinematic camera transitions
To create a camera animation:
- Select the Camera Track.
- Move the playhead to the desired position.
- Adjust camera settings.
- Add a keyframe.
- Move forward on the timeline.
- Change camera settings again.
- Add another keyframe.
STPro Animator automatically interpolates movement between camera keyframes.
Example Workflow
Section titled “Example Workflow”- Place characters and assets in the scene.
- Create a camera keyframe at the beginning of the timeline.
- Move the playhead forward.
- Adjust the camera position or zoom level.
- Add another camera keyframe.
- Preview playback.
The camera will smoothly transition between the two positions while all scene elements remain synchronized.
Note
Camera animations are applied globally across the full timeline and affect the entire scene view rather than individual assets.
Keyframes
Section titled “Keyframes”Keyframes store property values at specific points in time.
When multiple keyframes exist, STPro Animator automatically generates the motion between them.
Keyframes can be used for:
- Position
- Scale
- Rotation
- Opacity
- Blur
- Brightness
- Flip
Creating Keyframes
Section titled “Creating Keyframes”To create a keyframe:
- Select an object.
- Move the playhead to the desired time.
- Open the Properties panel.
- Adjust a supported property.
- Click the Keyframe button.
The Timeline will display the new keyframe automatically.
Editing Keyframes
Section titled “Editing Keyframes”Existing keyframes can be modified at any time.
Users can:
- Move keyframes
- Delete keyframes
- Adjust timing
- Change property values
This allows precise control over object movement and visual effects.
Timeline Scrubbing
Section titled “Timeline Scrubbing”Timeline scrubbing allows users to manually move through an animation.
Simply drag the playhead across the Timeline.
This helps users:
- Preview specific moments
- Check animation accuracy
- Verify transitions
- Inspect object behavior
Working with Multiple Assets
Section titled “Working with Multiple Assets”The Timeline supports multiple animated elements simultaneously.
Example:
- Character walking
- Background image moving
- Prop rotating
- Text fading in
Each asset maintains its own track while remaining synchronized with the scene.
Animation Workflow Example
Section titled “Animation Workflow Example”A typical workflow includes:
- Add a character.
- Place the character in the scene.
- Move the playhead to the start.
- Add a position keyframe.
- Move the playhead forward.
- Change the character position.
- Add another keyframe.
- Preview the animation.
The Timeline automatically generates smooth motion between the keyframes.
Best Practices
Section titled “Best Practices”For better animation results:
- Keep keyframes organized
- Preview frequently
- Avoid unnecessary keyframes
- Use smooth timing transitions
- Save projects regularly
These practices improve workflow efficiency and animation quality.
Common Issues
Section titled “Common Issues”Animation Not Playing
Section titled “Animation Not Playing”Possible causes:
- No keyframes created
- Incorrect playhead position
- Playback paused
Solution:
- Verify keyframes exist
- Restart playback
- Check timeline position
Keyframe Not Visible
Section titled “Keyframe Not Visible”Possible causes:
- Wrong object selected
- Timeline zoom level too small
Solution:
- Select the correct asset
- Adjust timeline zoom
Motion Appears Too Fast
Section titled “Motion Appears Too Fast”Possible cause:
- Keyframes placed too close together
Solution:
- Increase the distance between keyframes on the Timeline
Benefits of the Timeline
Section titled “Benefits of the Timeline”The Timeline provides:
- Precise animation control
- Organized scene management
- Smooth keyframe animation
- Better synchronization
- Efficient workflow management
- Professional animation editing tools
Summary
Section titled “Summary”The Timeline is the core animation control system in STPro Animator. It allows users to manage playback, create keyframes, organize animation tracks, and control scene timing. By combining Timeline controls with the Properties panel, users can create smooth, professional-quality animations with precise timing and motion control.
Next Step
Section titled “Next Step”Continue to the next section to learn about:
- Rendering and exporting projects
- Video generation workflow
- Render settings
- Downloading completed animations